
Are you thinking that digital scrapbooking might be a good fit for you, but you aren’t sure where to start? Well, the best way to learn to digi scrap is to just dive in and try it!!
Here's a short Tutorial that I made =)
1. Open Adobe PS ( I’m using Adobe PS CS3 Extended)

2. Open your desired background paper, I will use a
freebie V-Day Sampler Kit for this tutorial.
NOTE: It’s better if you have a folder for
all your DS kits so that you can easily find them
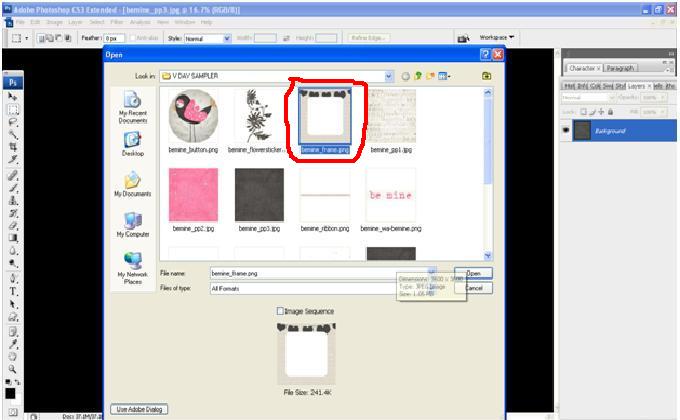
3. I will use this paper from the V-day kit

4. I opened the paper and now will work on layers.
5. To view the layer toolbar, go to Window then
click Layers

Now you have the Layer Window on the right side of your screen.

6. Now you have the background paper ready.
7. Choose an embellishment for your layout. I chose
a frame from the same kit.
NOTE: It’s better if you have a template that
you can rely on so you can get desired design.
8. Now that the frame is open, click the minimize
button so that you can see the Background

9. You can drag the frame by using the arrow button
called MOVE TOOL


10. Drag the Frame going to the background paper.

11.
Do these for all the embellishments
12. Now let’s put a picture in it.

13. As you can see, the picture is infront of the
frame. You can move the picture to fit the frame by dragging the layer before
the frame layer


14.
Now the picture is inside the frame
15. Add journaling by clicking the TEXT OR TYPE TOOL. Create
a Text Box.


16.
When done, save your layout as JPEG.

17. If you want to continue, save it as .PSD

18. Here's the finished Layout.. Easy right?

Happy Scrapping!
No comments:
Post a Comment