Showing posts with label Digital Scrapbooks. Show all posts

Tuesday, October 23, 2012

No more photoshop :(

My Photoshop is GONE!
This means no more High Resolution Digiscrapbooks, cupcake toppers, tarps, etc! urggggghhhhh!!!!
and back to my good old friend, MS Powerpoint.
I wish to have PS soon...

Here are LOs that I created using MS Powerpoint.


Oh, I forgot to mention that our LIPAT BAHAY last Saturday was a success!!!
My kids love our new home :)

Well, Goodbye PS! I will surely miss you! :(

Thursday, October 18, 2012

Wednesday, August 15, 2012

August DS

So I've attempted to scrap again. 
I don't know what's happening but it seems that I've lost my so called creative mind after I underwent C-Sec last April.. 

Showing you my latest LO


KIT: Cinnamons Scraps

I uber love this kit and it's FREE!!!

Grab it here

https://www.facebook.com/pages/Cinnamon-Scraps/105469666185157?sk=app_161128210587174

Happy Scrapping!


Saturday, June 30, 2012

A Quick Simple Sunbaby CD DS

Hello!
Sorry been busy for the last few weeks *zombie mode*

Just dropping by to show you what I made...


Saturday, May 5, 2012

Saturday, April 14, 2012

Arkin's DS

Back to scrapping...
Lexi and Hubs were away last night to pick up my SIL from the airport then they headed to my IL's place in Cavite.

I was not that sleepy last night and I made some DS for Arkin.
Here they are...


Monday, April 9, 2012

Back to scrapping...

Hi everyone!!!

I was sooo dizzy these past few days and I'm unable to face the computer for long hours.. 
(I guess it's the effect of spinal anes during my C-Sec last Monday)

But yesterday, I tried to scrap a page.. and here is it....

KIT: Suzy Q

I also made a cover page for my FB Timeline =)

KIT: Suzy Q

Saturday, March 31, 2012

Life at 37 weeks pregnant


I’m 37 weeks  yesterday, and I feel like I’m just about ready to pop.
I have swollen ankles, heartburn& indigestion. 
The bump (and the boy) are getting bigger and rounder. 
His kicks are so strong now, and feel like they’re reaching my ribs! 

I’m still having trouble sleeping, despite my body being pretty tired and I’ve lost count of the amount of times I have to go to the toilet during the day

 I just hope he doesn’t come out during the Holy week!

KIT: SUZY Q SCRAPS


Saturday, March 24, 2012

36 weeks Preggy DS


Here I am in all of my 36 week glory! 
We are entering the final countdown here. 
It is good to see the finish line right now. 
I find that I am more than ready to just bring on this next stage of our lives. 
While overall I am still feeling good, the extra weight and size are dragging me down a bit. 


I am at the point where getting comfortable can be quite difficult. 
Some nights sleep is descent and then some nights it is really hard to come by. 


Also, I really want to meet this little man.


DS - old pics of Lexi


My new pages for this month (using old pictures of my lil girl..)


Tutorial: Creating DS using MS Powerpoint


Happy Saturday Everyone!

I have received several questions from friends and online buddies on how to create Digital Scrapbook Pages but once I tell them that I use Adobe Photoshop: they seem to lose interest..
Well, I understand… Adobe Photoshop sounds too difficult.
But there’s a very easy way to create your own DS and that is by using our friendly MS tool..which is…
Microsoft Powerpoint.. yup..
Powerpoint.

 I found out that I can create DS using this tool when my Adobe PS crashed.. and I was desperate to make a Birthday page for a friend..and I was not disappointed with the outcome.

Here’s my simple tutorial…

STEP 1
Open your MS Powerpoint

STEP 2
Choose Layout then click BLANK


STEP 3
Open a Background Paper.
Note: Like what I’ve mentioned in my previous tuts, set a layout/design in mind so that you won’t have a hard time executing it

Download freebie kits here...


STEP 4
I will open a new paper and will layer this as an embellishment.
 How to crop?
Go to the Crop Tool on the upper portion of your screen.
Once you see the Crop Edges, crop as desired.


STEP 5
Assemble your added embellishments
I added 3 new embellishments here:
1.       Green Flower
2.       Another Flower
3.       Swirl

STEP 6
Add the Picture
TIP: It will appear more appealing if you choose your color combination using the base color in the picture that you will insert (e.g. you are wearing red, use red paper and elements)


Okay as you can see, the picture is HUGE.
You can resize it by using the circle buttons on the edges of the pic.. but use the upper right button so you won’t end up distorting the image.


Here’s my desired size..


STEP 7
Re-arranging Layers
If you noticed, the image is blocking the embellishments.
You can move the image backwards by using the Selection Pane


Click the button on the lower right side of your screen to re-arrange layers.
You now have the picture behind the embellishments


STEP 8
How to Tilt images or embellishments
Easy.. just click on the green circle and it will let you tilt the image


STEP 9
Editing the Picture.
Go to Picture tool then click Contrast or Brightness.

STEP 10
Adding wordart.
Go to HOME the insert Wordart


You can choose the font by going back to HOME then choose your desired font.


And here’s my finished layout


 STEP 11
Saving the image as JPEG.
You need to click the Slide Show icon.


Once you see the page, click PrtSc (PRINT SCREEN) on your keyboard.
Open PAINT (in the Accessories of Windows) then hit CTRL V.
Save the File as JPEG

STEP 12
Finalizing the DS
Open the image using Microsoft Photo Editor.


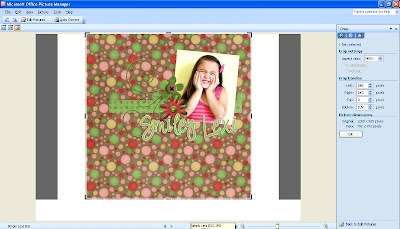
Click Crop then crop the unnecessary edges


Once done, save the image…

TA DA!

Here’s the finished DS.


It’s very simple but pretty.. right? J

Hope this tutorial helps!

If you have any question/comments, please click on the comment button below.

UPDATE 09AUG12
You can also skip the whole Printscreen part by doing SAVE AS JPEG!!!
Soooo much easier!